You took out international private medical insurance (IPMI) for peace of mind while you’re abroad. The real test, though, is what happens when you need to claim. Small slip-ups — missing a pre-authorisation, submitting incomplete documents, or using the wrong form — can easily lead to frustrating delays. This guide takes you through the IPMI claims process step by step, so you can be reimbursed (or have your provider paid) as smoothly as possible. We cover direct settlement vs reimbursement, pre-authorisation, supporting documents, submission routes (portal/app/email), follow-up, and common pitfalls to avoid.
Meta description: Step-by-step guide to making an international health insurance claim. Learn when to use direct billing vs reimbursement, pre-authorisation steps, required documents, and submission methods to help avoid delays.
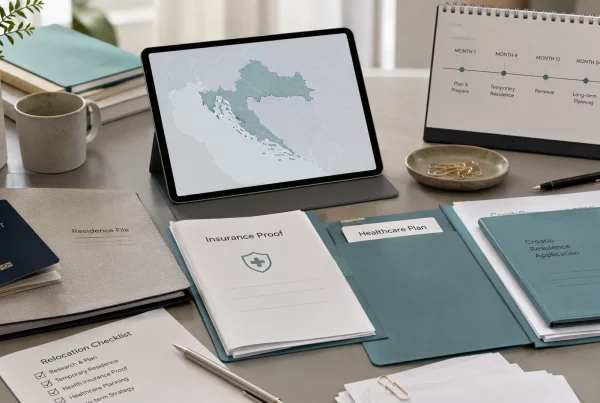
Before you receive any treatment, make sure you have the essentials in place:
- Your insurer’s contact details and emergency helpline saved on your phone and kept somewhere accessible.
- Access to the insurer’s online portal or claim forms (request a login, or download the PDF claim forms if needed).
- Your policy number and membership/ID card to hand (you’ll need these for most enquiries and claims).
- A clear understanding of any excess/deductible and/or co-payment, and funds available to pay any amounts due up front.
- Copies of relevant medical records or consultant/GP letters where available (kept with your policy documents).
- Plan ahead: Check whether your treatment needs pre-authorisation and allow enough time to obtain it.
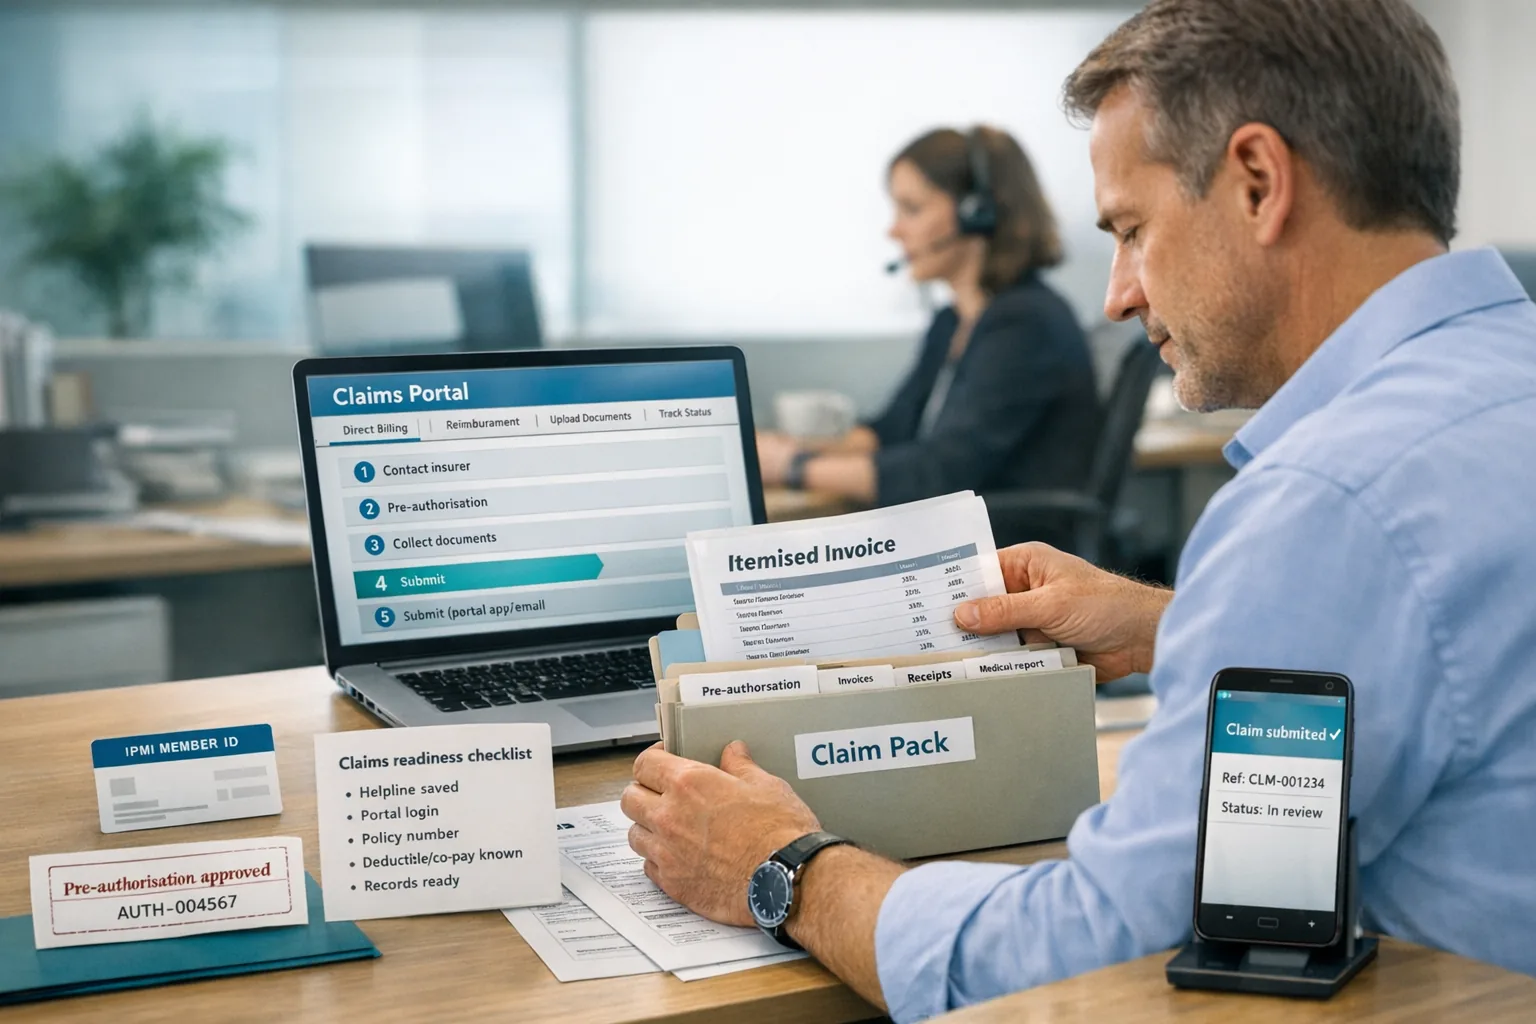
- Choose the right settlement route: Use direct settlement/direct billing (insurer pays the provider) where possible to reduce out-of-pocket costs. Otherwise, you may need to pay first and claim reimbursement.
- Get pre-authorised: For admissions and major procedures, follow your insurer’s pre-authorisation process closely. In an emergency, you’ll usually still need to notify the insurer promptly (often within 48 hours) to help avoid payment issues.
- Collect the right paperwork: Gather itemised invoices, receipts, claim forms and medical evidence as required. Clear, complete documentation helps speed up assessment.
- Submit correctly: Use the insurer’s portal or app if available (typically fastest and easier to track). If not, submit by email or post in line with the insurer’s instructions.
- Track and follow up: Record when you submitted the claim and any reference number. Processing times vary; if you’ve heard nothing within the insurer’s stated timeframe, follow up politely.
- Use support if you need it: Your broker can help you understand what your policy covers, complete forms, and liaise with the insurer’s claims team where appropriate.
When to use direct billing vs reimbursement
Most plans offer two main ways to settle eligible treatment costs. Direct billing (sometimes called direct settlement) is where the insurer pays the provider directly for covered treatment (you may still need to pay any excess/deductible and/or co-payment). Reimbursement is where you pay the provider yourself and then claim the eligible amount back from the insurer.
Direct billing (insurer pays the provider)
Use this where possible. It usually applies when the hospital or clinician is within the insurer’s network and any required pre-authorisation has been obtained. In that case, the provider invoices the insurer, and you should not need to pay the full cost at the point of treatment (other than any excess/deductible and/or co-payment). It’s still sensible to ask for copies of any invoices and any guarantee-of-payment/authorisation confirmation for your records.
Reimbursement (you pay, insurer reimburses you)
If direct billing isn’t available — for example, the provider is out of network, or you were unable to obtain pre-authorisation in time — you may need to settle the bill yourself. Keep all itemised invoices and receipts. You can then submit these with your claim (and any required supporting documents) to request reimbursement. This is common for routine outpatient appointments or where time is short.
 Treatment needed
    ↓
Contact insurer (for advice and/or pre-authorisation if required)
    ↓
Is the provider in-network and have you obtained approval where required?
  • Yes → Direct billing/direct settlement: Provider invoices insurer (you pay any excess/co-payment if applicable).
  • No  → Reimbursement: You pay the provider, then submit a claim with invoices/receipts.
    ↓
Submit the claim (if needed) with the required documents.
    ↓
Insurer assesses the claim and pays eligible costs (less any applicable excess/deductible/co-payment).
Pre-authorisation requirements
Pre-authorisation (also called prior approval) is the insurer’s agreement in advance for certain treatments. It is commonly required for hospital admissions, surgery, and other high-cost or specialist procedures. Your policy wording and/or benefits schedule will set out what needs pre-authorisation. Always check before booking treatment.
Why pre-authorisation matters
Insurers use pre-authorisation to confirm eligibility under the policy and, where available, to put direct billing in place. If you do not obtain pre-authorisation when it is required, the insurer may reduce the benefit payable or decline the claim (depending on the policy terms). In short: missing pre-authorisation can create delays and may affect how much is paid.
How to obtain pre-authorisation
The process varies by insurer, but it typically involves: (a) contacting the insurer as soon as you know treatment is planned; (b) completing the insurer’s pre-authorisation request form (often via their website or portal); (c) providing details such as the patient’s information, diagnosis, proposed treatment, dates, and provider/doctor details; (d) supplying relevant clinical information (for example, referral letters, test results or medical reports); and (e) submitting the request with sufficient notice, in line with the insurer’s stated requirements. If approved, the insurer will usually issue written confirmation (or an authorisation reference) to provide to the hospital/clinic.
Emergency treatment
If you need emergency treatment and cannot obtain approval in advance, receive the treatment first and notify the insurer as soon as reasonably practicable (many policies set a timeframe such as 24–48 hours). Keep all hospital records and documentation so the insurer can assess the claim afterwards and, where applicable, consider retrospective authorisation.
Your Name
Policy Number: [XXX]
Date: [DD MMM YYYY]

Subject: Pre-authorisation request for [Patient Name]

Dear Claims Team,

I am requesting pre-authorisation for the following planned medical treatment. Patient [Name] (Policy No. [XXX]) is scheduled to undergo [Procedure Name] on [Date] at [Hospital/Clinic Name]. The treating doctor is [Dr Name]. Please find attached the referral and supporting clinical information, including diagnosis details.

Please confirm whether this treatment is authorised under the policy, and provide any reference number needed so the provider can arrange billing.

Yours faithfully,

[Your Signature]
[Your Name and Contact Details]
Your Name
Policy Number: [XXX]
Date: [DD MMM YYYY]

Subject: Notification of emergency admission – request for retrospective review

Dear Claims Team,

I am writing to notify you of an emergency admission. Patient [Name] was admitted to [Hospital Name] on [Date] due to [brief description of emergency/diagnosis]. Attached are the admission note and treatment summary.

We were unable to contact you prior to admission. Please confirm the next steps and review the claim under the policy. I will provide any further information required.

Yours faithfully,

[Your Signature]
[Your Name and Contact Details]
(These are generic examples. Your insurer may require a specific form or portal submission, but this shows the key information insurers typically ask for.)
Documents you need (invoices, medical reports)
Before you submit a claim, gather all relevant paperwork. Missing documents are one of the most common causes of delay. Use the checklist below:
- Claim form: Many insurers require their own claim form for reimbursement claims. Complete and sign it, and ask your doctor to complete any clinical sections if required. Some insurers accept a written clinical statement instead of a form in certain circumstances — check your insurer’s guidance.
- Itemised invoices and receipts: Itemised invoices from each provider (hospital, doctor, laboratory, pharmacy) showing dates of service, a breakdown of charges, and the amounts billed. Keep receipts for any payments made. (Some insurers may ask you to sign receipts or provide additional verification.)
- Proof of payment: For reimbursement, include evidence that you paid (for example, a card receipt, bank statement, or an invoice stamped “paid”). Requirements vary, so follow the insurer’s instructions where possible.
- Medical evidence: Relevant medical reports, discharge summaries, referral letters and/or test results. If helpful, include a short explanation of the diagnosis and treatment to support the assessment. Policies often require clinical evidence for admissions and specialist treatment.
- Policy and membership details: Include your policy number and membership/ID number on all forms and correspondence. Some insurers or providers may also request a copy of your membership card and photo ID.
- For reimbursement claims (you paid): claim form (if required), itemised invoices, receipts, proof of payment, medical reports/referrals (as needed), policy and membership details.
- For direct billing: the provider usually invoices the insurer, but keep copies of the pre-authorisation confirmation and any guarantee-of-payment/authorisation letter, plus any invoices you receive, for your records.
Submitting the claim (portal/app/email)
Follow the submission method set out by your insurer. Digital routes are often quickest and easier to track:
- Online portal or mobile app: Many IPMI insurers offer an online portal or app to submit claims and upload documents. This is often the fastest option and allows you to check the claim status. (If you haven’t registered yet, it’s worth doing as soon as your policy is in force.)
- Email: If there is no portal/app option, insurers commonly accept claims by email. Attach scanned forms and supporting documents (PDF format is usually best). Some insurers also recommend email or fax in preference to post to reduce delays.
- Fax or post: If required, you can send physical copies by post or fax. If posting documents, use a tracked service and keep copies of everything you send. Postal submissions typically take longer, so use digital options where available.
Follow the insurer’s instructions carefully. Ensure your policy number (and any claim reference number) is included on every document. Keep copies of everything you submit, and retain email sent items or portal submission confirmations so you can follow up if needed.
Typical timelines and follow-up
Claims handling times vary by insurer, country, and the complexity of the treatment. Insurers may publish indicative timeframes, but these are usually dependent on receiving all required information.
Insurer targets (examples)
- Some insurers state that they aim to settle claims within a set number of days once they have received all required information.
- Providers may also be given submission windows for invoicing (for example, submitting invoices within a set number of days from treatment).
Your follow-up
Treat published timelines as a guide only and always check your policy wording. Make a note of the date you submitted the claim (whether via a portal, email, or post) and keep any reference number. If you have not received an update within the insurer’s stated timeframe, contact the claims team to confirm they have everything they need.
Escalation
If a claim appears to be delayed with no clear update, speak to your insurer and/or broker. We can often request a status update and help resolve missing information. If your claim is declined and you believe this is incorrect, policies typically allow you to ask for a review or raise an appeal/complaint in line with the insurer’s complaints process. Keep a record of all correspondence and the dates of any escalation.
In most cases, the simplest way to help speed up settlement is to provide complete, clear documents from the outset. However, timescales can vary and each claim is assessed on its own facts and policy terms.
Common pitfalls and how to avoid them
Even with good preparation, delays can happen. Here are some common issues and how to reduce the risk:
- Missing pre-authorisation: This is one of the most common issues for higher-cost treatment. If pre-authorisation was required and not obtained, the insurer may reduce the benefit payable or decline the claim. How to avoid it: Check the policy’s pre-authorisation requirements before booking treatment. If you are unsure, contact the insurer first.
- Incomplete or unclear documents: Missing pages, unreadable scans, or unsigned forms can slow assessment. How to avoid it: Use the checklist above. Make sure invoices are itemised, all pages are included, and any required signatures and dates are in place.
- Submitting the claim late: Some policies apply time limits for submitting claims after treatment. How to avoid it: Check your policy for any deadlines and submit as soon as possible after treatment.
- Out-of-network treatment and charge limits: If you use a provider outside the network, reimbursement may be limited to what the insurer considers reasonable and customary for that location and treatment. How to avoid it: Where possible, use in-network providers for larger costs. If you need to go out of network, ask for an estimate in advance and be prepared to pay any shortfall.
- Not notifying an emergency admission: Many policies require prompt notification for emergency admissions. How to avoid it: Contact the helpline as soon as you can (or ask someone to do this for you) and follow the insurer’s guidance on next steps and documentation.
- Not following up: Sometimes a claim is held because one document is missing or a query needs answering. How to avoid it: If you are outside the insurer’s indicated timeframe, follow up with your claim reference number and ask whether anything else is required.
The common theme is communication and completeness. Check requirements early, submit a full set of documents, and keep clear records of what you have provided.
How brokers assist with claims
As your broker, we can help you navigate the process. We can explain the policy wording (so you understand what is covered), highlight key requirements (such as pre-authorisation and any excess/deductible or co-insurance/co-payment), and advise what documents to submit.
We can also liaise with the insurer’s claims team, follow up on submitted claims, and help escalate queries where appropriate. Ultimately, claim decisions are made by the insurer in line with the policy terms, limits and exclusions, but we will do our best to help the process run smoothly.
For more background on choosing a plan or understanding IPMI, see our guides on Understanding International Health Insurance (IPMI) and Choosing the Right Insurer.
Get Started
If you need to make a claim, we’re here to help. Visit our Individuals & Families page to learn about cover options, or if you already have insurance, see Already Covered (Review my existing policy) for one-to-one advice on your existing policy.
Ready to apply? Get a Quote today. For quick answers to common questions, check our FAQ page.
Points to verify
Before you need to claim, check the following in your policy documents and insurer guidance:
- Direct billing network: Which hospitals/clinics can bill the insurer directly? Are you required to use the network for certain benefits?
- Pre-authorisation triggers: Exactly which treatments require pre-authorisation, and what notice period applies?
- Claim submission deadlines: How long after treatment do you have to submit a claim?
- Required forms: Does your insurer require a specific claim form or portal submission? Are referrals or medical reports routinely required?
- Excess/deductible and co-payments: What out-of-pocket costs apply, and when/how will they be collected (for example, at the provider or via invoice)?
- Submission routes and contacts: Does your insurer prefer portal/app submission, email, fax, or post? Note the correct contact details.
- Currency and payment method: How will reimbursements be paid (for example, bank transfer), in what currency, and are any bank fees likely to apply?
- Data protection and consent: Do you need to complete consent/privacy forms so the insurer can request and process medical information?
- Escalation route: If there is an issue, who should you contact (insurer claims team, broker, complaints team)?
Being clear on these points in advance helps avoid surprises when you need to claim.